Showing posts with label For kids. Show all posts

Friday, June 27, 2014

Easy Busy Board


I'm sure you've seen "busy boards" all over Pinterest, especially if you like doing crafts for/with your kids. They tend to have lots of engaging things on them, especially for fine and gross motor skills.

After (probably) a whole year of thinking about it, I finally made one for my youngest. I included a few things that most busy boards don't have, such as a big plastic zipper, a set of beads on an eye hook and command hook, and a piece of PVC that leads to a jar for small balls. I made sure to sand down all the sides, and I rounded out the edges so they wouldn't get splinters. The purple paint was leftover from another project, and I'm pretty sure it's some sort of latex paint made for interiors or something. I don't know. I'm not a paint pro.
The PVC was simply glued on with some SUPER super glue. On the other side of the jar is some heavy-duty Velcro so the kids could take it off and get the balls (or whatever) back. The zipper came from the craft store, and I'm pretty sure it's the kind for sports bags. It's definitely not for clothes, I know that. It was hot glued on, but I'd suggest a staple gun instead.
Everything else was drilled onto the board using screws that were (obviously) shorter than the wood was thick. The screws that came with the hardware would've been too long.

I also wanted my girls to have some sort of art easel or chalkboard to draw on. Buying new baby gear isn't my thing since they don't use it long, but I couldn't find one that I liked.
The plywood came from the hardware store, and I technically paid for the whole big piece, so they cut it down for two equally-sized pieces. Finally, I decided to use the extra piece for a chalkboard. I sanded it, painted it, then taped off a big rectangle for the chalkboard paint. It required 4-5 coats rather than 2 because of how shiny and "slippery" the purple paint was. I bought a couple really basic hinges to attach the two boards together, lined them up, and drilled them into place.

Now my girls have something to draw on and a busy board to fiddle with. Overall I'm really happy with how it turned out, though I wish I could've grabbed a cheap doorknob or something else for the open spot, and I plan on adding a chalk holder below the chalkboard so there's not chalk all over the place.

Good luck with yours, and feel free to post any questions you may have! :)

Monday, September 30, 2013

DIY Costume for Baby in a Wrap

Last year for Halloween my baby was only a month old, and to help my older daughter at the same time, I decided to wear my newborn. Thanks to my wonderful wrap, she slept almost the entire time we were out trick-or-treating, and when she was awake, she didn't fuss at all.

Anyway, I still wanted her to have a costume, but I didn't want to do all of the usual stuff, or copy anyone because I like being unique. My husband is a gun enthusiast, so I decided on a 12 gauge shotgun shell. Yeah, it's kind of out there, but everyone thought it was quite interesting.

< That based off of this >


It was pretty easy to come up with since the wrap I use has a place to insert the "body" of the costume. The casing is red, so I just used a spare red towel, but you can use any fabric you want that matches the round you're trying to imitate.

I free-handed the design, but I'm sure you could cut yourself a stencil, or try some other way of printing onto your fabric.

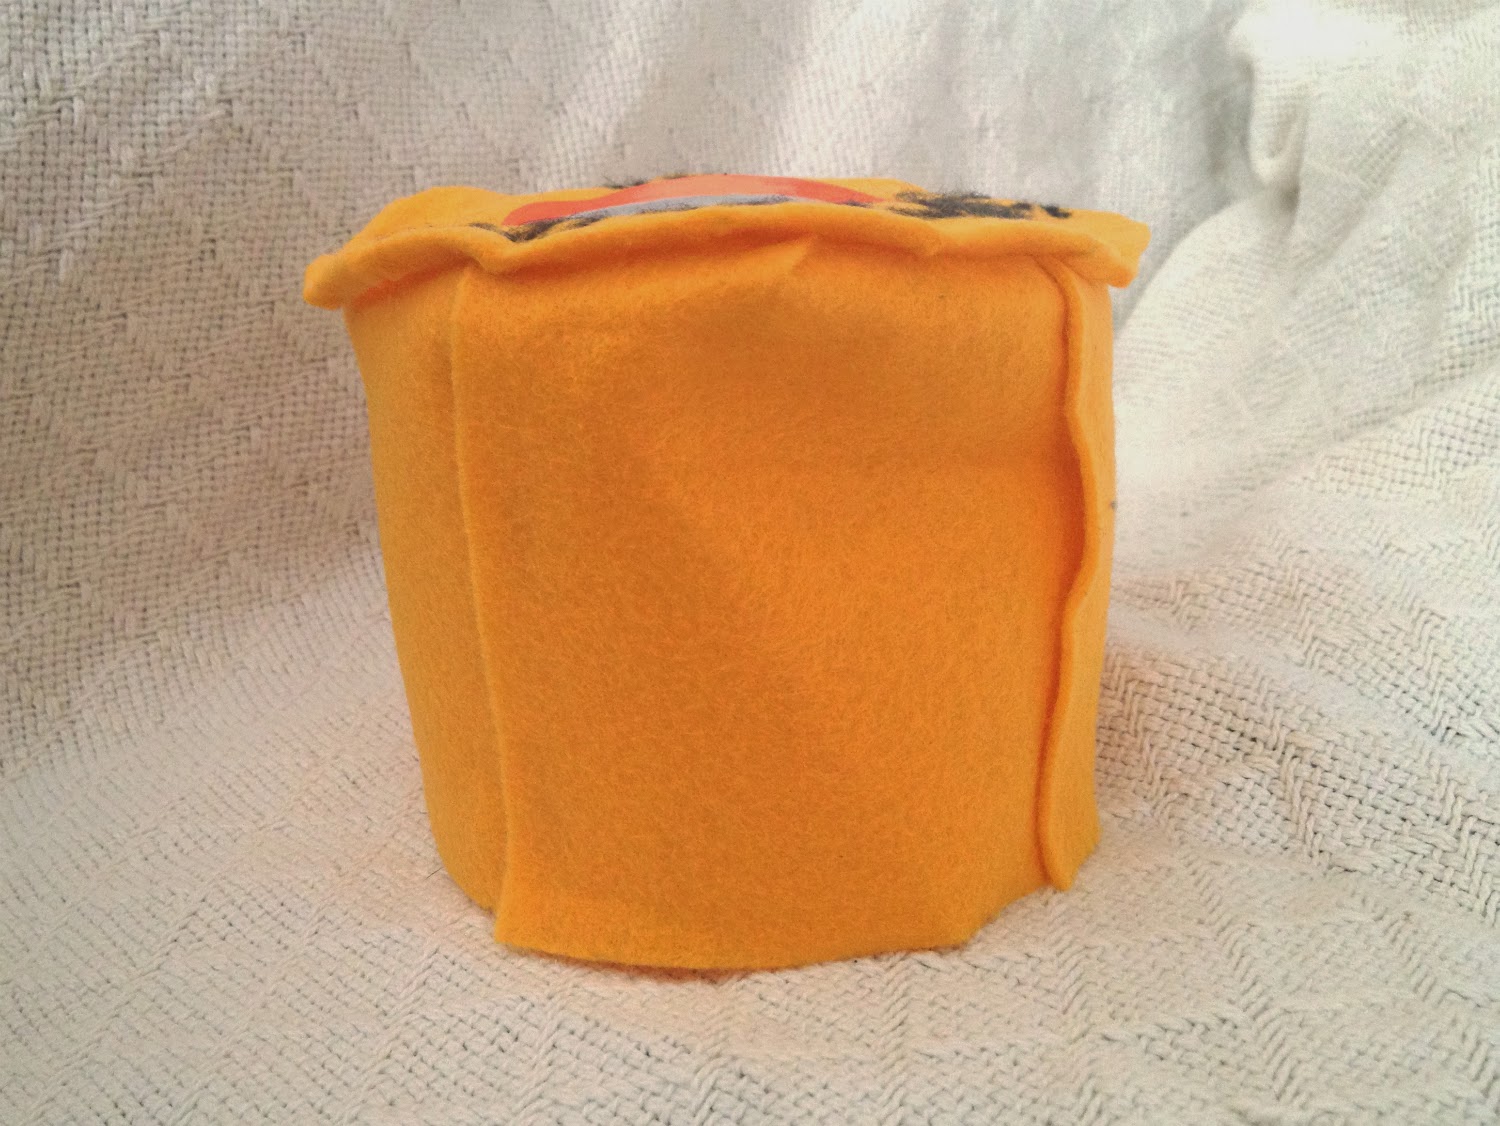
The hat needed to be able to stay rigid, but be gentle on baby's head. Felt is perfect for that, and it's super cheap. Just measure your baby's head with a measuring tape and cut to size. You may need to use two pieces if your felt isn't long enough.

Make sure you make it tall enough so it stays on and the top can lay flat, plus an extra 1/2 inch to fold over so you can secure the top to it. Bring the ends together and secure with hot glue or a needle and thread. Make approximately 8 slits, more if your baby has a big head, at the top 1/2 down. Fold the pieces over on each other and secure.

The top is simply a felt circle that is a little bit bigger in diameter than the bottom part of the hat. Write the words onto the circle that you normally see on the metal part. For the middle, I cut out a circle from a piece of paper and painted it to match a used shell, then glued it to the middle of the felt circle. Secure the circle to the flaps.

That's it! To put it together, place the hat on baby's head, and insert the towel/fabric into the wrap or baby carrier. If you don't want it to flap around, secure the bottom with safety pins, strong hair pins, or anything else that can fasten the fabric to the carrier.

Simple, easy, and crazy cheap.
Towel/Fabric - free (since I had it laying around)
Felt - $0.58
How awesome is that?!

Tuesday, September 10, 2013

Tulle Tutu Tutorial


 Really fluffy tutu tutorial!
Use lightweight tulle for a fluffier tutu, and heavier tulle for a straighter tutu.

Here's a plain pink one in a newborn size. It's great for newborn pictures and Halloween.


Saturday, September 7, 2013

Origami Crane Mobile

Here's an easy, cheap, and elegant piece of decor perfect for a kid's room, your room, or any other room. You can even use paper in certain colors and patterns to match a party or wedding!
The origami crane mobile!

What you'll need:
Sticks (I used wire hanger leftovers, but you can use wooden dowels or even twigs for a rustic feel. Just make sure you treat them so they won't go bad!
Thread, fishing line, or string and a needle
Origami cranes (I used 12)
Glue gun (optional)

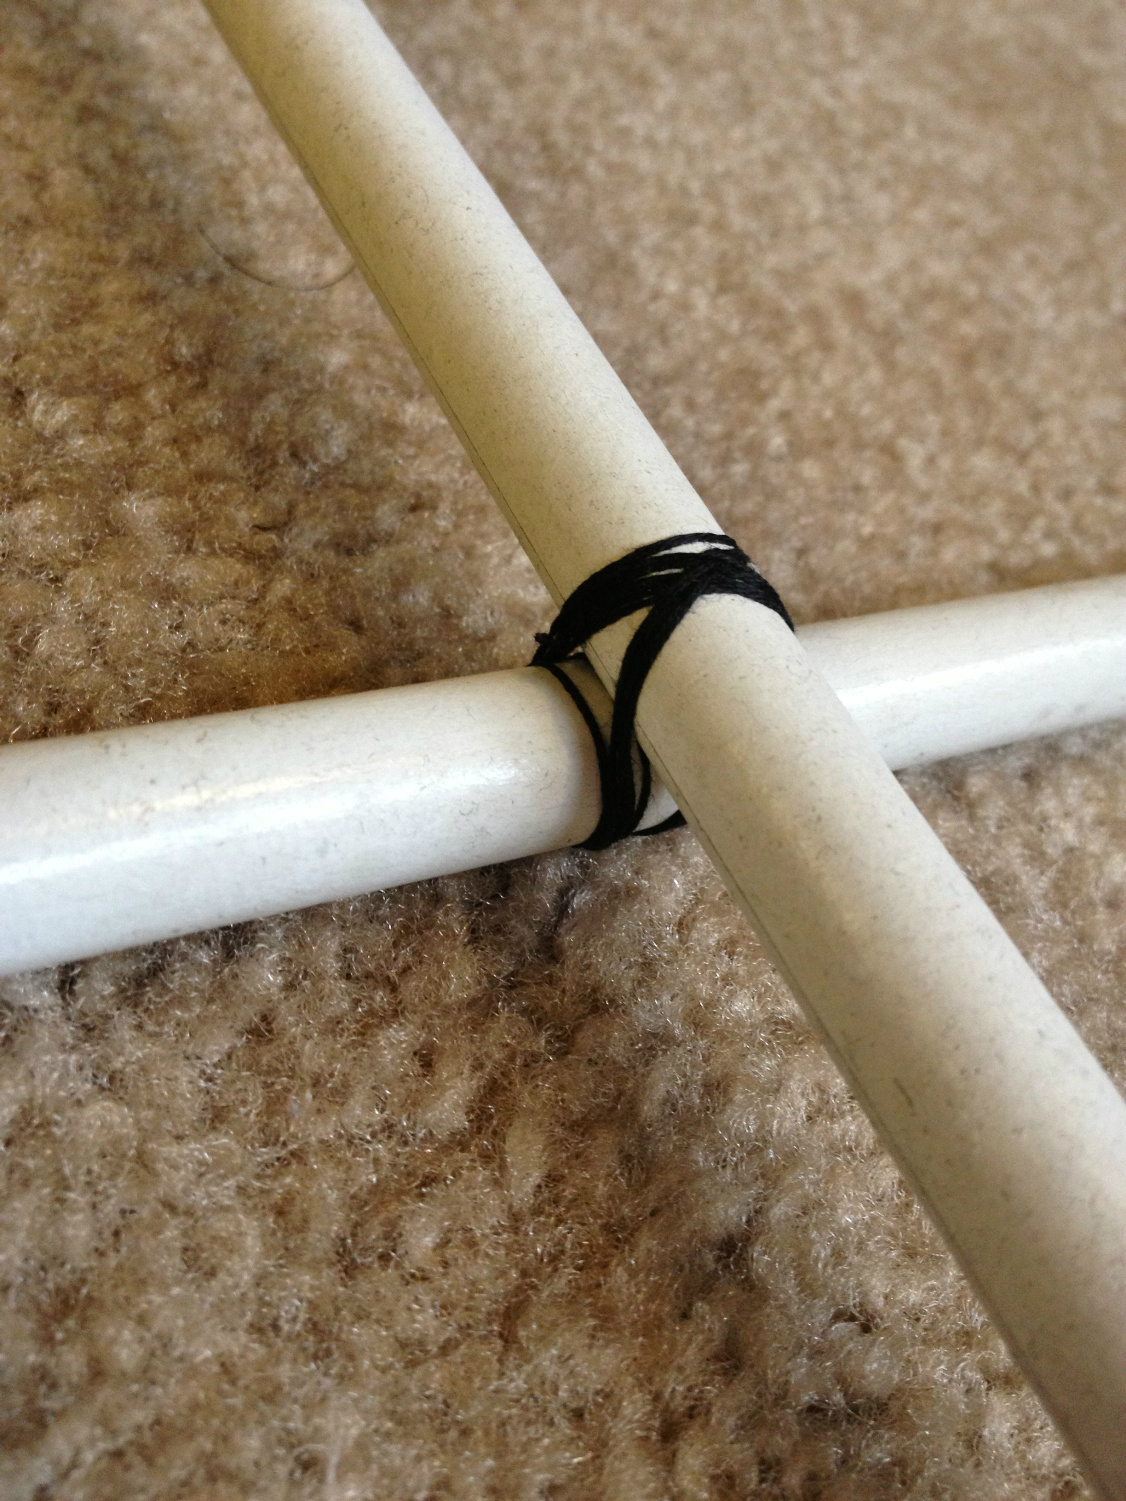
Start by arranging your sticks into a +

and binding the middle like so:
Set this aside.

Grab your cranes.
Find the hole in the bottom of your crane.

Thread your needle and make a good-size knot at the opposite end. Insert the needle into the hole and through the top.

For multiple cranes on the same thread/line/string, make another large knot a few inches above the previous crane and thread the needle through the crane.

Tie the top of the string near the end of the sticks and glue the string to the sticks to secure it (if you don't want to remove them ever). Use extra string to hang it up.

All done!


I tied one piece of string to either end of one stick, then I took another string, tied it to the middle of the first, then tied those ends to the other stick. This prevents any unbalance in the mobile.