Apparently some list is going viral on the interwebs. Which is fine. I don't really care.
What I do care about is the fact that some people are using this article to put down those of us who did get married young, or at least using it for additional ammunition. Honestly, getting married young, middle-aged, or not at all is totally up to personal preference, but here's my reasoning for why getting married young was a good thing for me and my husband.
My husband and I were together for five years before getting married. We started dating at the ripe age of 14. Middle school/high school sweethearts, I suppose. We learned a lot about each other in that amount of time: what we like, dislike, what gets us upset, what calms us down, what stresses us out, what food we're into, what ideas we share, what things we can debate about. We knew a lot about each other, and we were totally in love, so we got married a year after graduating high school.
According to a lot of people, that was way to early. They would say that I don't even know myself well enough, let alone know someone else enough to spend forever with them. But you know what? Just like everyone is never finished learning, no one is ever finished finding who they are. Thanks to my husband, I've found a side of me that probably would've taken a lot longer to discover had I been on my own. I found out that I can be a strong, opinionated woman, and my husband was there to help bring that to the surface. Sorry, random article, but I don't need to make out with strangers to know who I am deep down. I don't rely on my husband for my identity. Rather, he supports me in my decisions, and empowers me when I otherwise wouldn't be able to empower myself.
For example:
I found my religious standings after getting married. Before then, I couldn't take a step back to evaluate what it all meant to me.
My husband and I explored our sexuality together, rather than trying to figure it out by ourselves. Because of that, we know what gives each other great pleasure, and what can shut it down in an instant.
I finally discovered what I want to do for a career (small business), and he supports my decision to do it on my own instead of with a partner.
Sure, you can do a lot of things being single, but you can do PLENTY while married:
1. Get your passports together.
2. Find your "things" together.
3. Set up a romantic date and then make out all night.
4. Adopt a pet.
5. Start a duet act.
6. Bake and decorate a cake or cupcakes together. Feed each other by hand.
7. Get a tattoo that means something to yourself. (Not names, though.)
8. Each of you explore a new religion, then compare experiences.
9. Start a small business with or without each other.
10. Give each other hair cuts. Buy hats beforehand just in case.
11. Role play a first date with each other.
12. Build something together.
13. Accomplish a Pinterest project. Show your partner and laugh at how bad it went.
14. Join the Peace Corps together.
15. Impress your parents-in-law.
16. Make a date to lay on the couch, eat junk food, and watch a TV series all day/night.
17. Split a jar of Nutella and a package of ice cream in one sitting.
18. Make strangers feel uncomfortable in public places. (For example: sit on either side of a person on a bench, and slowly scoot closer together.)
19. Join a gym together.
20. Dance naked together in front of a window.
21. Each of you keep a secret diary from each other.
22. Get yourself something nice, have your partner do the same. Then, give it to each other to wrap and give back.
23. Travel to some random place and party!
Once again, I really couldn't care less what you do with your relationships, but just remember that not everyone is in the same place as you are, and while some people want to live it up and stay single, others are perfectly fine with settling down and having kids.
Monday, December 30, 2013
Thursday, October 3, 2013
Kali's First Birthday
This past Saturday we had Kali's, my youngest daughter, birthday. It was supposed to be a bigger party, but it turned into a smaller one. I had set up a dessert table and a photo booth, although neither really got used.
 Here's the entire kitchen set up. I was going to decorate the entire house in this motif, but I ran out of time. Good thing I didn't, though, because only one other family and one friend showed up. Anyway, the bunting is based off of American maritime signal flags, since this was a ocean/water themed birthday.
I used plain construction paper, tape, hot glue, and twine. Every square was 9x9 inches. I secured the flags to a piece of white paper folded over the twine, then hot glued them in place so they wouldn't slide all over. The flags spell out her name, which I thought was pretty clever, if I do say so myself.

 The pom poms were made out of tissue paper. Several layers of tissue paper were placed on top of each other, then folded up in a fan configuration. I folded them in half, then tied a string or ribbon around the middle. Then you just open up the fan and separate the layers to get it to "puff."


 Of course my desserts and snack table was inspired by Pinterest. My table was way too big to make it look "full" of stuff, like most other dessert tables, but there was plenty left over (almost all of it). I bought the pails, utensils and napkins, and all of the serving trays from the dollar store. The little "fish bowl" was full of graham cracker sand and sea animal-shaped fruit snack. Originally it was going to be a guessing game, and whoever guessed the closest would win the whole thing. (There were 115 fruit snack, by the way.)
 I had planned on piping the royal icing border just right and flooding the inside, but I didn't get to them until the last half hour before the party was supposed to start. Instead I roughly piped anchors onto the cookies and flooded them. Admittedly, they do look like anchors, but they're just not as pretty and precise as I would've liked them to be.
 The baby seals wore swimming caps, so I knew I had to integrate that into the cake. The bottom tier has the baby seals (one is cut-off, I know. She was supposed to be coming out of the water), and the top tier represents the swimming caps full of flowers.

She wanted to get her hands on that cake so bad.

I made the photo booth in the spare area in our living room. I simply folded a dollar store table cloth in half and put it up with duct tape. The store also had construction paper sea animals which I taped to the tablecloth. The "waves" were made with blue streamers taped from top to bottom. It was really cute, and I wish I had gotten a picture of the whole thing. Kali wouldn't sit still enough to get a good picture of her in front of it.

Overall, it was a cute party, and instead of a formal party, we all just hung out while the kids played outside. I shouldn't have stressed so much over such a small party, but I thought more people would show up. Either way, I loved doing it because I got some good pictures, and I'm sure Kali will appreciate it in the future. I will definitely hold off on doing a big party again until we're back home and more people, including family, can attend. Oh, the fun life of being a military family.
I hope I inspired you to go just a little crazy for your kids' birthday. Even a small party can look amazing, especially on a tight budget.
 UPDATE: I was able to set up the photo booth again, so I got a decent picture of it.
Here's the entire kitchen set up. I was going to decorate the entire house in this motif, but I ran out of time. Good thing I didn't, though, because only one other family and one friend showed up. Anyway, the bunting is based off of American maritime signal flags, since this was a ocean/water themed birthday.
I used plain construction paper, tape, hot glue, and twine. Every square was 9x9 inches. I secured the flags to a piece of white paper folded over the twine, then hot glued them in place so they wouldn't slide all over. The flags spell out her name, which I thought was pretty clever, if I do say so myself.
The pom poms were made out of tissue paper. Several layers of tissue paper were placed on top of each other, then folded up in a fan configuration. I folded them in half, then tied a string or ribbon around the middle. Then you just open up the fan and separate the layers to get it to "puff." Of course my desserts and snack table was inspired by Pinterest. My table was way too big to make it look "full" of stuff, like most other dessert tables, but there was plenty left over (almost all of it). I bought the pails, utensils and napkins, and all of the serving trays from the dollar store. The little "fish bowl" was full of graham cracker sand and sea animal-shaped fruit snack. Originally it was going to be a guessing game, and whoever guessed the closest would win the whole thing. (There were 115 fruit snack, by the way.)
I procrastinated really bad and didn't do the cookies until the last minute.
I had planned on piping the royal icing border just right and flooding the inside, but I didn't get to them until the last half hour before the party was supposed to start. Instead I roughly piped anchors onto the cookies and flooded them. Admittedly, they do look like anchors, but they're just not as pretty and precise as I would've liked them to be.
I consider myself a hobbyist cake artist, so her cake was the focal point of the table. Most nautical cakes have anchors or boats on them, and ocean cakes usually have waves, the usual sea life (fish, octopi, sea turtles, etc.), and/or sea shells. I wanted her cake to be different and unique, and she already had a super cute birthday outfit with baby seal on them.
The baby seals wore swimming caps, so I knew I had to integrate that into the cake. The bottom tier has the baby seals (one is cut-off, I know. She was supposed to be coming out of the water), and the top tier represents the swimming caps full of flowers.
These marshmallow pops were inspired by this pin. I didn't think cheese Goldfish really went well with delicious marshmallows, so I used s'mores Goldfish instead. In my opinion, it tasted much better than it would have with the cheese.
She wanted to get her hands on that cake so bad.
I made the photo booth in the spare area in our living room. I simply folded a dollar store table cloth in half and put it up with duct tape. The store also had construction paper sea animals which I taped to the tablecloth. The "waves" were made with blue streamers taped from top to bottom. It was really cute, and I wish I had gotten a picture of the whole thing. Kali wouldn't sit still enough to get a good picture of her in front of it.
Overall, it was a cute party, and instead of a formal party, we all just hung out while the kids played outside. I shouldn't have stressed so much over such a small party, but I thought more people would show up. Either way, I loved doing it because I got some good pictures, and I'm sure Kali will appreciate it in the future. I will definitely hold off on doing a big party again until we're back home and more people, including family, can attend. Oh, the fun life of being a military family.
I hope I inspired you to go just a little crazy for your kids' birthday. Even a small party can look amazing, especially on a tight budget.
 UPDATE: I was able to set up the photo booth again, so I got a decent picture of it.
Monday, September 30, 2013
DIY Costume for Baby in a Wrap
Last year for Halloween my baby was only a month old, and to help my older daughter at the same time, I decided to wear my newborn. Thanks to my wonderful wrap, she slept almost the entire time we were out trick-or-treating, and when she was awake, she didn't fuss at all.
Anyway, I still wanted her to have a costume, but I didn't want to do all of the usual stuff, or copy anyone because I like being unique. My husband is a gun enthusiast, so I decided on a 12 gauge shotgun shell. Yeah, it's kind of out there, but everyone thought it was quite interesting.
 < That based off of this >
It was pretty easy to come up with since the wrap I use has a place to insert the "body" of the costume. The casing is red, so I just used a spare red towel, but you can use any fabric you want that matches the round you're trying to imitate.


Anyway, I still wanted her to have a costume, but I didn't want to do all of the usual stuff, or copy anyone because I like being unique. My husband is a gun enthusiast, so I decided on a 12 gauge shotgun shell. Yeah, it's kind of out there, but everyone thought it was quite interesting.
< That based off of this >It was pretty easy to come up with since the wrap I use has a place to insert the "body" of the costume. The casing is red, so I just used a spare red towel, but you can use any fabric you want that matches the round you're trying to imitate.
I free-handed the design, but I'm sure you could cut yourself a stencil, or try some other way of printing onto your fabric.
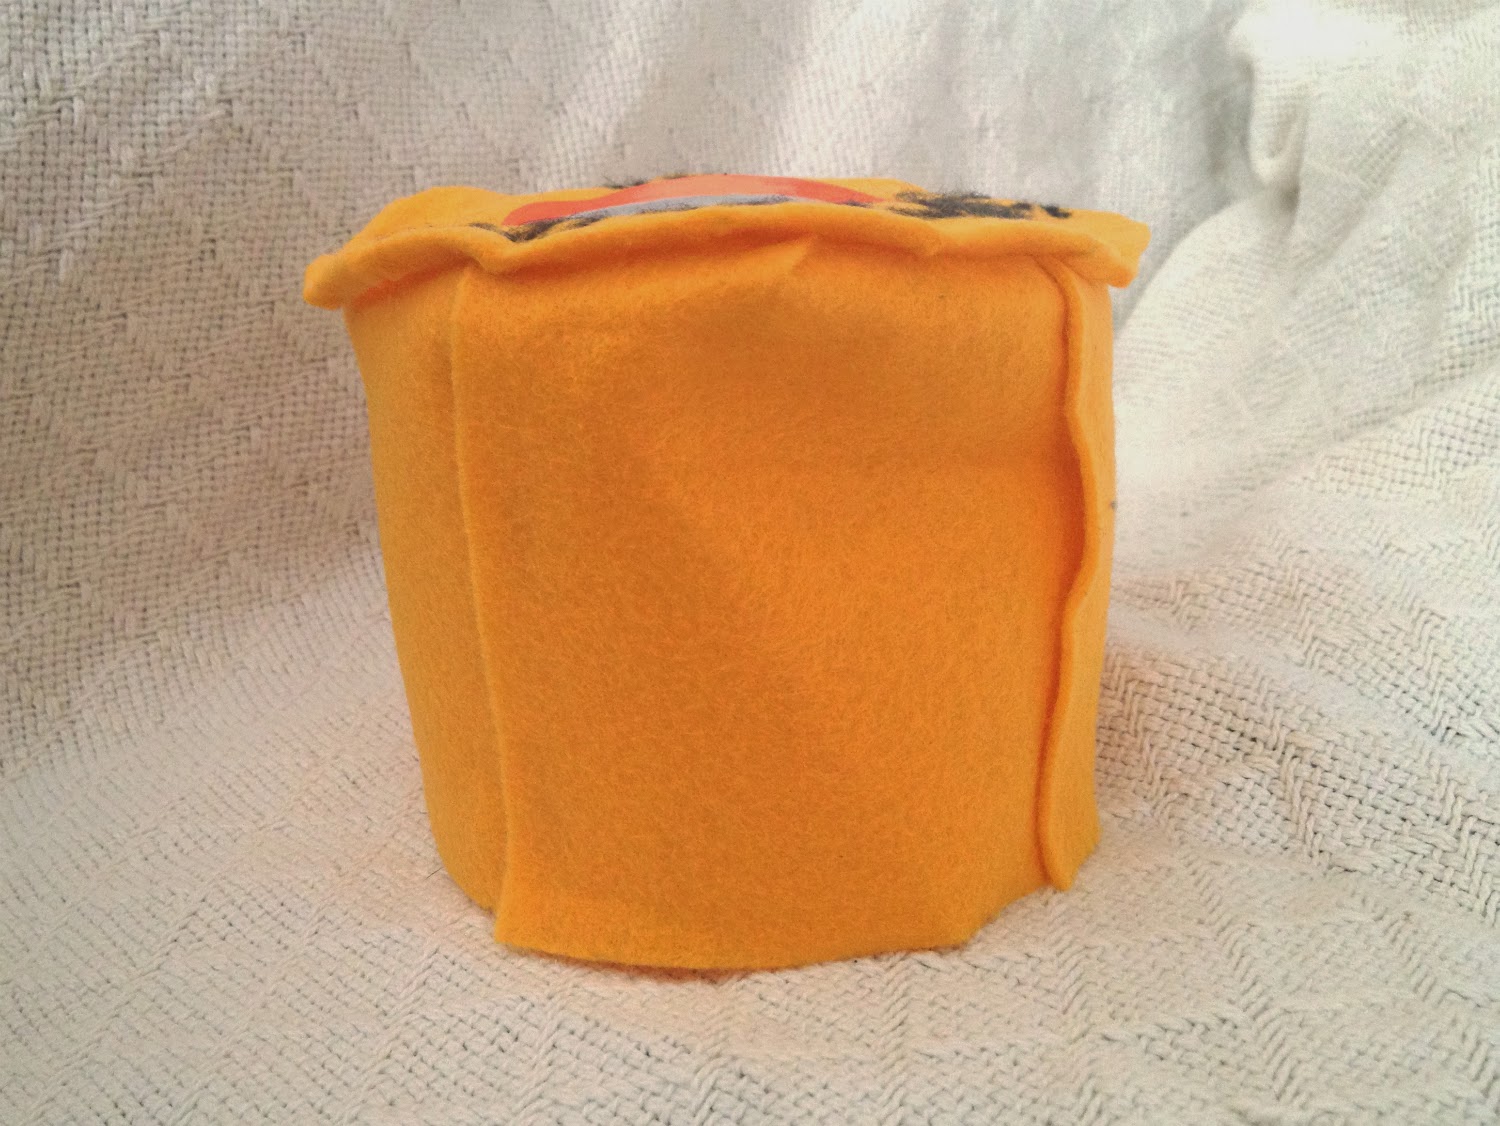
The hat needed to be able to stay rigid, but be gentle on baby's head. Felt is perfect for that, and it's super cheap. Just measure your baby's head with a measuring tape and cut to size. You may need to use two pieces if your felt isn't long enough.
Make sure you make it tall enough so it stays on and the top can lay flat, plus an extra 1/2 inch to fold over so you can secure the top to it. Bring the ends together and secure with hot glue or a needle and thread. Make approximately 8 slits, more if your baby has a big head, at the top 1/2 down. Fold the pieces over on each other and secure.
The top is simply a felt circle that is a little bit bigger in diameter than the bottom part of the hat. Write the words onto the circle that you normally see on the metal part. For the middle, I cut out a circle from a piece of paper and painted it to match a used shell, then glued it to the middle of the felt circle. Secure the circle to the flaps.
That's it! To put it together, place the hat on baby's head, and insert the towel/fabric into the wrap or baby carrier. If you don't want it to flap around, secure the bottom with safety pins, strong hair pins, or anything else that can fasten the fabric to the carrier.
Simple, easy, and crazy cheap.
Towel/Fabric - free (since I had it laying around)
Felt - $0.58
How awesome is that?!
Tuesday, September 10, 2013
Tulle Tutu Tutorial
Really fluffy tutu tutorial!
Use lightweight tulle for a fluffier tutu, and heavier tulle for a straighter tutu.


Here's a plain pink one in a newborn size. It's great for newborn pictures and Halloween.


Saturday, September 7, 2013
Origami Crane Mobile
Here's an easy, cheap, and elegant piece of decor perfect for a kid's room, your room, or any other room. You can even use paper in certain colors and patterns to match a party or wedding!

The origami crane mobile!
What you'll need:
Sticks (I used wire hanger leftovers, but you can use wooden dowels or even twigs for a rustic feel. Just make sure you treat them so they won't go bad!
Thread, fishing line, or string and a needle
Origami cranes (I used 12)
Glue gun (optional)
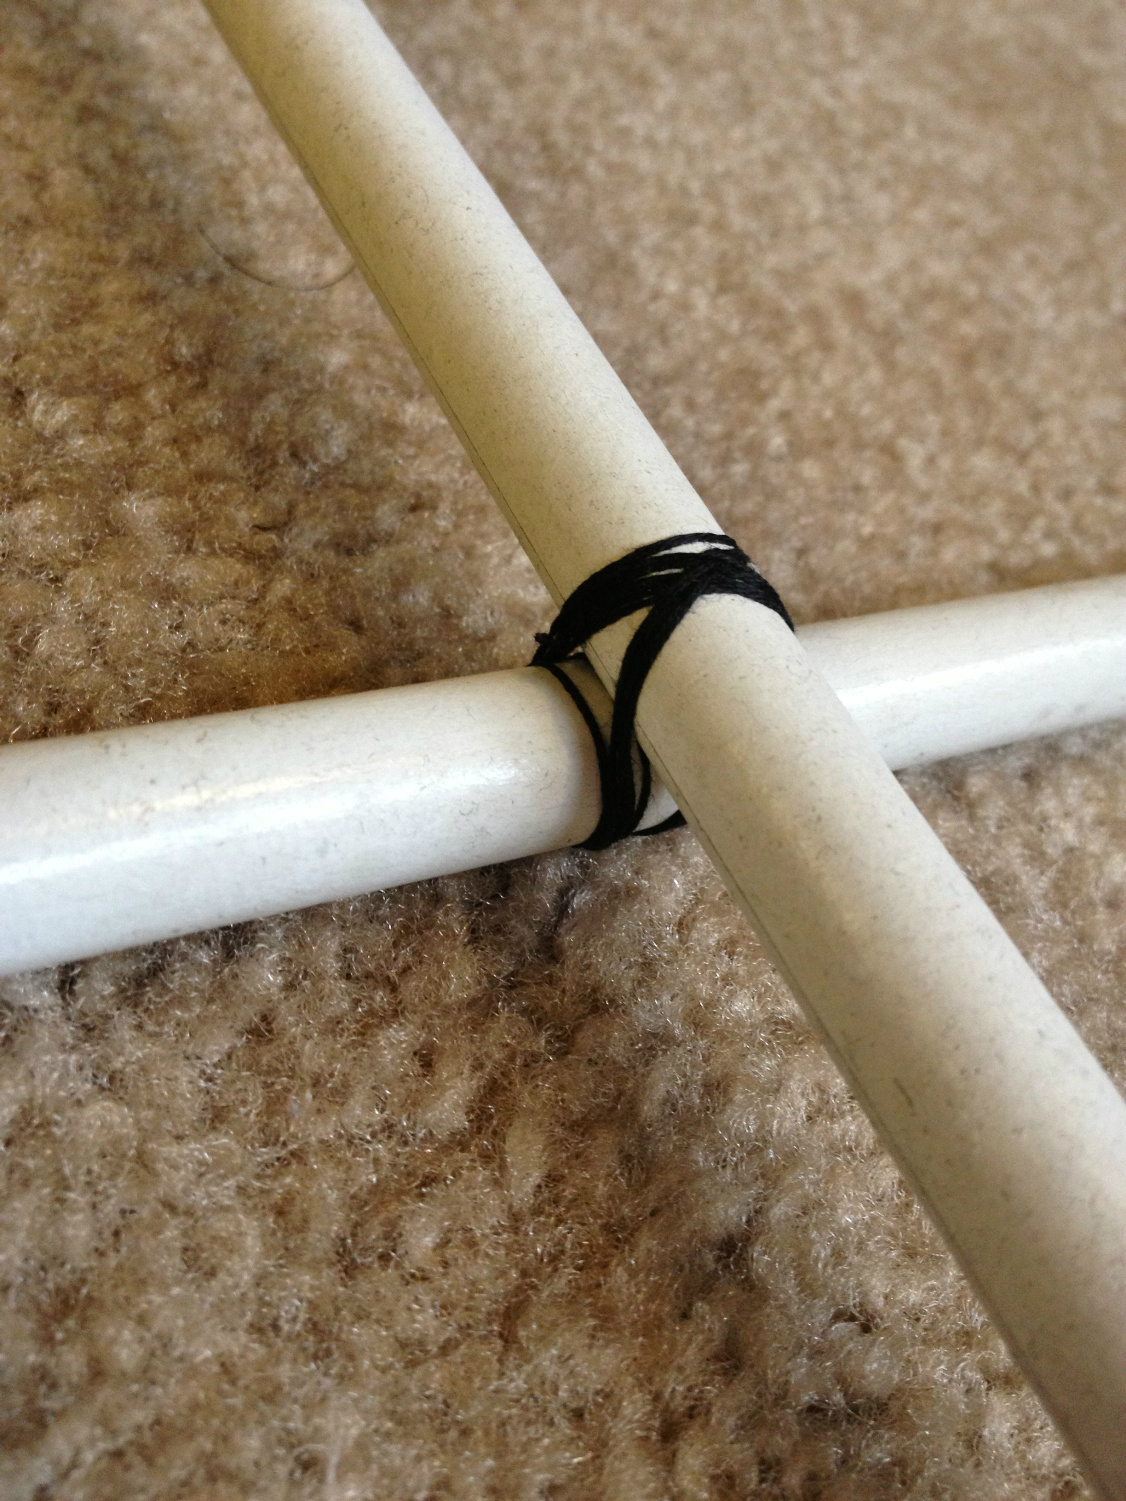
Start by arranging your sticks into a +

and binding the middle like so:
Set this aside.
Grab your cranes.
Find the hole in the bottom of your crane.

Thread your needle and make a good-size knot at the opposite end. Insert the needle into the hole and through the top.


For multiple cranes on the same thread/line/string, make another large knot a few inches above the previous crane and thread the needle through the crane.
Tie the top of the string near the end of the sticks and glue the string to the sticks to secure it (if you don't want to remove them ever). Use extra string to hang it up.
All done!


Subscribe to:
Posts (Atom)